In A More Beautiful Question, Warren Berger talks about the power and potential of different types of questions. One type that stands out is the simple strategy of asking ‘What If?’ Here then are my thoughts on what if the web were different? #pcPopUp2020
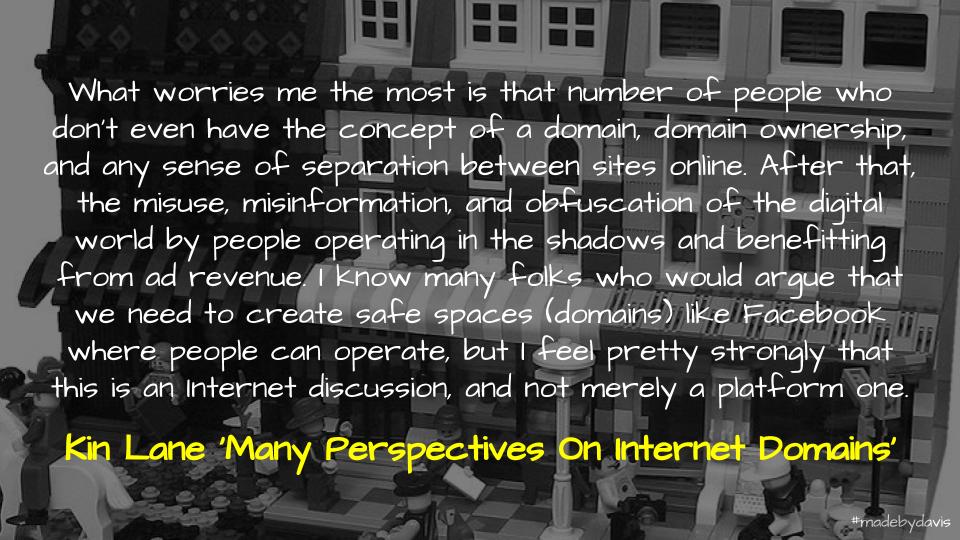
What if people had some sort of ownership and control of their presence on the web?
#pcPopUp2020#DoOO
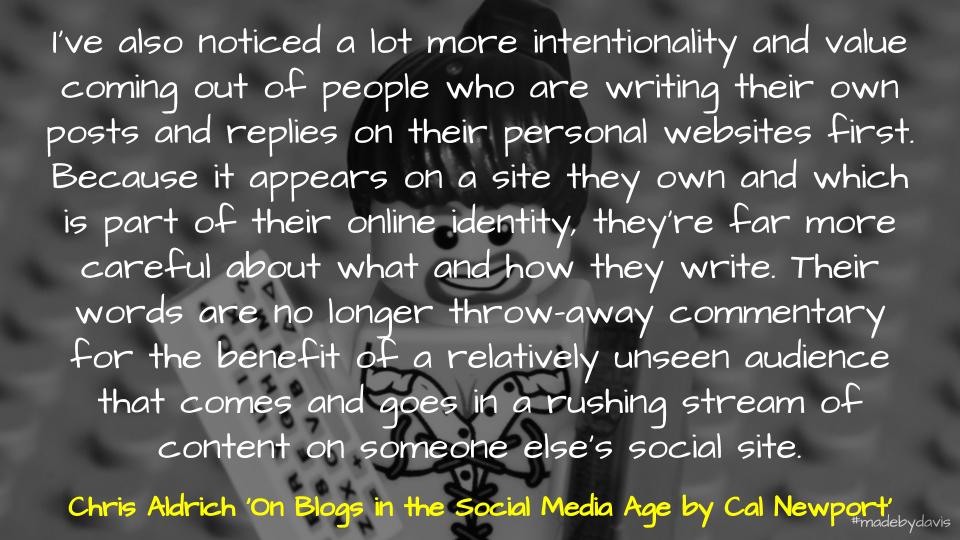
What if we posted comments to other spaces from our own sites utilising the power of #webmentions? Both keeping a record of our conversations, as well as owning our opinions.
#pcPopUp2020#Commonplacebook HT @amyburvall
My intent with these posts is not to suggest that everyone should or must do all or any these things, but instead to stop for a moment and think about the decisions we make about technology and ask ourselves how might we work together to make a better web for all?
Using Doug Belshaw’s notion of ‘Digital Literacies, I will focus on critical thinking, creativity and communication. If a school wished that they could cover just about all the Digital Technologies Curriculum using blogging. Blogging has so many entry points that it can be differentiated to the needs of any learner and/or classroom.
Ongoing Reporting with GSuite
Using Doug Belshaw’s notion of ‘Digital Literacies, I will focus on critical thinking, creativity and communication. Although this does not necessarily cover coding, documentation and ongoing reporting covers most other aspects, such as data collection and creating digital solutions. The point of ongoing reporting is to be differentiated. The challenge is choosing the right solution for the problem at hand. This will be addressed in the session.
It can be easy to look at an application and provide one answer, the problem with this is that it does not cover all contexts. This presentation will explore some of the possibilities of GSuite to support ongoing reporting and assessment.
With the rise of digital texts, it is easy to save quotes these days. The challenge though is do something with them. Using Slides, it is easy to combine text and images in order to develop deeper understanding.
Quote from Rushton Hurley’s keynote at EdTechTeam Canberra 2018
This is a collection of instructions that were turned into a blog, located at: flippingthelearning.global2.vic.edu.au
Here is a PDF copy of the resource, which includes screenshots.
Starting a Blog
The term blog derives from ‘web log’ and was initially coined to describe “discrete entries (posts) typically displayed in reverse chronological order.” There are many different platforms out there, each having their benefits and negatives. What does not change is the focus presenting mixed media, including video, text, images and audio. Blogging provides many opportunities.
Kathleen Morris discusses a number of benefits, including home-school connections, authentic audiences, developing a classroom community and ICT skills. Here is a guide to starting a blog with Global2:
GLOBAL2 HOMEPAGE: Go to the Global2 homepage (http://global2.vic.edu.au) and click ‘Log In’ in the top left hand corner.
LOG IN: If you already have an account, enter your credentials and sign in. Otherwise, click ‘Register’ to sign up for a new account.
REGISTER AN ACCOUNT: Enter a username, valid email address and decide if you want to start a site or just create an account. Usernames can only contain lowercase letters (a-z) and numbers, while the email account used must relate to your educational institution, for the domains associated with state and Catholic schools have already been entered into the system. It is important to think about what personal information is posted online and this starts with a username. You are also required to agree to the terms of service listed.
CREATE A SITE: The next step is to create a web address and site title. The address must be at least four characters long and include a mixture of letters and numbers. There is also a range of privacy settings to help define the audience of the site. The department recommends the ME WE SEE model in breaking down these differences. Other than the address, the rest of this information can be changed at any point (Settings > Reading). Therefore, it is a good idea restricting permissions to just the owner until comfortable in sharing with the world.
DASHBOARD: Once signed up and/or signed in, users are taken to dashboard. From here it is possible to do many things, including creating a post, uploading media and installing plugins.
Embedding Third-Party Content
A number of web services allow users to insert content. This can be useful in enhancing your site, without adding additional plugins and functionality. Here is a guide to embedding content with Global2:
CREATE NEW ENTRY: Go to the top of the blog and click on ‘new’. This entry can be a post, wiki or page. They all allow embedding.
EMBED CONTENT: There are two methods for embedding content with Global2:
INSERT URL
Edublogs builds on the code to automatically embed content from some services, including Flickr, YouTube, Instagram, Twitter, Scribd, SlideShare and Pinterest. (See this Edublog post for a full list of sites and steps involved.) This involves pasting the full URL on a separate line and making sure that it is not hyperlinked.
INSERT EMBED CODE
For services not supported, you can use an embed code to add content. To do this, go to ‘Add Media’ where you can paste in the embed code.
NOTE: One of the benefits of an actual embed code is that you can directly adjust the various attributes, such as height and width. It is also possible to paste the code in directly using the text editor as opposed to the visual editor.
Podcasting
Podcasting is a means of capturing multimedia via RSS and taking the content with you. Although it is often associated with audio, it includes video as well. This content can be inserted via the media library, listing this as a podcast provides a feed that is searchable, subscribable and downloadable. One of the challenges is finding a service to manage this process. Global2 provides a plugin which supports this task.
INSTALL PLUGIN: Go to Plugins menu and search ‘podcast’. Once found, activate the podcast plugin.
SETUP ACCOUNT: A new sub-menu is added to the Settings menu (Settings Menu > Podcasting). Open this and work through the various options, including title, summary, tags, categories and player options. Once everything is complete, press ‘Save Changes’.
ADD MEDIA: Create a file and upload this into the media library by clicking ‘Add New’ in the Media menu. Copy the URL associated with the uploaded file.
CREATE POST: Begin a new post. There is a space at the bottom of the editor to paste the link to the media file. Once added, assign author and keywords associated with the file. Then click ‘Send to Editor’ to add shortcode into the post and publish to finish.
NOTE: Although podcasts can be both audio and video, the maximum file upload for Global2 is 50mb which limits the use of video.
Making a Class Blog
Blogs can provide a means for managing a whole class to collectively engage in learning. Watch this video from Sue Waters for a short introduction:
Unlike other spaces, such as Google Classroom or Edmodo, blogs can also provide more control over content. Using a theme like Houston also provides a useful introduction to social media. Here is a step-by-step guide to setting up a class blog:
CREATE A CLASS: Identify a site to act as a hub. This might be a new site or a pre-existing one. Once decided, ‘Create a Class’. This is done via the My Class menu (My Class > Create a Class).
SET UP CLASS SITE: Work through the settings. First, confirm the site is to become a hub. Then decide how this site will be used, whether posts and comments will be moderated and the privacy settings applied to all the blogs.
BONUS – CREATE STUDENT USERS AND BLOGS: When creating student accounts and new users, it is important to consider the details that might be provided through the username and URL. A simple rule to follow is to avoid putting three pieces of personal information, this includes things such as tagging names on photos in the metadata. Edublogs provide further suggestions here.
Although individuals can have a channel where content is posted, another way of collaborating is through a Brand Account. With multiple owners, there is no need for a separate username or password.
CREATE A NEW CHANNEL: Go to overview in the settings and create a new channel (YouTube Settings > Overview > Create a New Channel). As with any channel, there is a requirement to verify the account.
ADD USERS: The difference between a brand account and a personal account is that multiple users can be added to a brand account. To add users, go to Add and Remove Managers (YouTube Settings > Overview > Add and Remove Managers). This takes users to the myaccounts.google.com page where they are able to adjust the information attached to the account.
SETTING PERMISSIONS: There are three roles associated with users attached to a brand account. Owners control all aspects of the channel, while managers can add videos. Communication managers have no privileges associated with YouTube. This is a role associated with other platforms, such as Google+.
NOTE: The other way of setting up a brand account is by transferring the content associated to an existing Google Account. To do this, users go to YouTube Settings. In the settings, choose to Move channel to Brand Account. Users are then required to select the Brand Account they would like the content transferred to. This can be useful if starting from scratch or wanting to transfer ownership.
Adding Media
Beyond adding text, links and formatting, there are a number of options for adding media to posts and pages. The first step is to upload the files to the media library. There are several ways to do this:
When you click + New at the top of the page, there is the option to add media.
At the top of the Post and Page pages there is an Add Media button
If you are in the Media Library there is an also an Add New button.
NOTE: In regards to media, you can upload documents, videos, audio, images and a few other formats, such as .xml and .kmz. The maximum file size allowed is 50mb (a particular constraint when it comes to video), while there is a 2gb limit for the site overall. You are also able to add a range of information, such as title, caption and description, as well as apply basic edits to images. Other than embedding a media player to play video and inserting images, media is added as a link within the text.
Plugins
Plugins are small applications which extend the functionality of the site. This is what differentiates Global2 and WordPress from other content platforms.
There are a number of plugins available, including those addressing appearance, forms, media, administration, social media and widgets. Here is a guide for adding a plugin to a site:
PLUGIN MENU: Go to Plugins menu. This can be accessed via the Dashboard.
EXPLORING PLUGINS: There are a range of categories that allow users to focus their search. Otherwise, there is the option to type keywords into the searchbox.
Adds a series of share buttons to the base of every page and post.
See Edublogs for a complete description of what is available. This also includes links to additional support pages for each.
ACTIVATE PLUGIN: Once a plugin has been chosen, activate it to add it to the site.
ADJUST SETTINGS: Most plugins provide additional settings to adjust. These are either housed within the Settings menu or as a menu themselves.
Embed 360 Content
Although Google allows you to contribute to Google Maps, there are times when you may not want this content to be posted publicly. The VR Viewer plugin allows you to embed your own 360 content into a post.
CREATE A 360o IMAGE: Using a mobile device, capture a 360o photograph to a desktop computer. Google have a list of tools and applications that can be used.
ACTIVATE VR PLUGIN: Go to Plugins menu and search ‘VR’. Once found, activate the VR Viewer plugin. There is no menu associated with this, activating simply builds the functionality into the site.
UPLOAD 360o IMAGE: Upload the 360o image into the media library by clicking ‘Add New’ in the Media menu. Copy the URL associated with the uploaded file.
EMBED WITHIN A POST: Switch to the text editor and paste in the follow shortcode [vrview url=”{URL}” stereo=”false” width=”100%” height=”400px”], replacing {URL} with the URL associated with the uploaded file.
NOTE: If you wish to add an existing Street View image to a post, Google provides an embed code. This is found in the top left corner of any Street View. Personal images can also be contributed to Google Maps. Go to the menu in Maps and click on ‘Your Contributions’ to upload.
Awesome Table lets you display the content of a Google Sheet into various types of views: From a simple table to people directories, Gantt chart views, Google Maps, card views… There are many possibilities to suit your personal and professional needs. With it, data in Sheets are shown in a more functional way and can be shared with viewers.
From a flipped point of view, Awesome Table can provide a way of organising resources and then embedding this dynamic table somewhere:
GO TO SITE: Sign into Awesome-tables.com with your Google account. This will then link with Google Sheets.
CHOOSE A TEMPLATE: Preview the different templates provides and once happy, click Use Template to create a copy.
INPUT THE DATA: Open the Spreadsheet attached to the template. There are two sheets tabs at the bottom of the spreadsheet: data and template. To use the basic template as is, delete the dummy data and add your own. Depending on the template selected, you may need to refer to the support site for information related to the upload of specific elements such as images.
CUSTOMISING TEMPLATE: If there are fields that you do not want built into the template, then you can change the headings in the Data sheet. However, make sure that you do the same within the Template sheet.
SHARING AND EMBEDDING DISPLAYS: Once complete, it is possible to both share a link to the display or embed it using an iframe.
NOTE: It is possible to really customise an Awesome Table or even start from scratch. For those wanting to go down this path, there is a support site with a range of documentation. John Stewart has also written a useful introduction.
Resources
Flipped
Flipping the Teacher – Steve Wheeler provides an introduction to ‘flipped learning’.
Joel Speranza – A blog collecting a number of tips and tricks to support teachers with flipped learning.
Mister Wootube – Eddie Woo provides a wide array of a ‘not quite’ flipped classroom videos, where he captures the learning moment as it happens.
Virtual Reality
Connecting Classrooms with Google Module – A unit exploring resources from Google that assist with connecting classrooms including Virtual Field Trips, Expeditions and Google Arts and Culture.
YouTube Course – A unit exploring unit, exploring searching for suitable content, subscribing to channels, setting up a playlist and creating a channel.
Creator Academy – Learn tips from savvy creators as they showcase their secrets and level up your YouTube skills with Creator Academy lessons
Creating Video Content – A post unpacking some alternatives to creating video outside of YouTube.
My presentations with Cathy O’Halloran and Richard Callanan held at Manor Lakes College on 6th and 7th April, 2017
Connecting Learners with Google
Collaboration
Google+
Google’s answer to other social media platforms, Google+ provides many of the usual features, such as hashtags, the ability to tag users and a news stream. Where it is useful is the potential to organise information using Collections, as well as to foster collaborative spaces with Communities.
The Beginner’s Guide to Google+ – This post from Ryan Lytle provides a step-by-step guide to support new users in getting started.
Learning professionally with Google+ Communities – Camilla Elliott explains some of the benefits of Google+ Communities for sharing and collaborating. This is seen as an alternative to other spaces, such as Facebook Pages.
Get Connected wtih Google+ – Heather Baille created a video that showcases some of the potential associated with Google+.
Another possibility when it comes to the connected classroom is Google Classroom. It provides many of the same features as Google+, such as feed and topics. With the recent addition of Gmail accounts, it is possible to connect between schools, as well as bringing in experts. It needs to be noted that Classroom also provides a range of other features designed to support instruction in the classroom, such as setting assignments and doing quizzes.
Triple Differentiation in Google Classroom – Beginning, Middle, and End – Eric Curts demonstrates how Google Classroom can be used to differentiate learning. This is a useful exploration of many of the new features, such as setting specific work for individual students, incorporate different resources and allow students to submit a wide range of products.
Google Classroom Experts – A Google+ account designed to share all things associated with Classroom. A useful place to pose questions and find specific resources.
Google Classroom for the Principal – Lisa Meade describes some of the ways that principals can use Google Classroom in and out of the classroom to connect with staff and students.
YouTube Live allow for synchronous video connections beyond the four walls of the classroom. There is the means to run a video chat or schedule a recorded event using YouTube Live. This can be used to connect different classrooms, conduct virtual debates or provide an alternative point of access to classroom material. For example,the students at St. Mark’s broadcast their Genius Hour presentations via YouTube Live. There are also many other possibilities beyond Hangouts / YouTube including Skype,Twitter andTouchcast.
Let’s Hangout! – Jen Zurawski identifies a range of examples for how to collaborate with Hangouts.
A virtual field trip to CERN, via Google Glass – Andrew Vanden Heuvel uses Google Glass to provide students from the other side of the world with an insight into a place they would not normally have access to.
The Google+ communityConnected Classrooms Workshop offers a platform for connecting with other classrooms around the world via Mystery Hangouts.
Data and Ideas
My Maps
Originally Maps Engine Lite, My Maps allows users to create their own maps within G Suite. My Maps allows you to easily make layers, add place marks, draw shapes and create directions. To take this to the next step, users can also import information via a spreadsheet or KMZ files from Google Earth.
How to Create Custom Maps with My Maps – Richard Byrne has made a series of tutorials associated with creating map, importing data and sharing information
Literary Landscape Map – Kevin Hodgen collaboratively shares different settings within books.
Natural Resources – Austin Houp has created a map representing natural resources.
Trends and Correlate
Google Trends is based on Google Search data and allows users to see what search terms are trending. It shows how often a particular term or phrase is entered into Google Search compared to all other searches across different parts of the world at different times and in different languages.Google Correlate reverses Google Trends and allows users to start with a trend and find searches that match.
N-Gram viewer is a tool that searches Google’s digitised printed material to determine how frequently particular words or phrases have appeared over a particular time in literature. These results are then displayed graphically. Users can compare the frequency of different terms in printed material over time.
Google provides a number of way to engage with virtual reality includingYouTube videos, variousmobile apps, Street View andtreks. The Expedition app (available forAndroid oriOS) takes treks and provides viewers with a choreographed experience.
Some ideas include exploring vocabulary, engaging with real life problems, telling stories and sparking curiosity. There are also arange of options for users toadd their own images to Street View, as well as record their own360 Minecraft videos.
Google Maps Treks – A link to the various treks around the world, including places like the Angkor Wat and Petra.
Google Arts and Culture (currently in beta) is the latest iteration of Google’s Art project. It currently allows users online access to high resolution images of artwork found in 46 museums around the world. Virtual tours of many of the museums are available (using Street View technology) along with a range of educational resources.
Google Arts and Culture YouTube Channel – There is a collection of shows and documentaries on everything from explorations of natural history to kids describing famous pieces of art to experts.
Google Cultural Institute Puts Us All Onstage – Michael Cooper explains how the cultural institute allows you to go beyond a simple walkthrough of places on YouTube to being able to move around the ballet or through a gallery using the technology developed for Google Street View.
Google Cultural Institute – A Fascinating Place – Marcus Lilley explains how the cultural institute and the new digital exhibition are allowing for a reimagining of Shakespeare’s work by actually position ourselves within the performance.
Connected Classrooms in Action
Below is a list of examples of connected classrooms:
Our Genius Hour Expo and Google Hangout – The students at St. Marks share their Genius Hour projects via Hangout and then answer questions ask via Google Forms. 10 groups of students presented. More than 1500 students, teachers and parents registered for the Hangout from Australia, New Zealand and beyond.
Smarter Than You Think Collaborative Reading – A collaborative reading and exploration of Clive Thompson’s Smarter Than You Think as a part of a Theory of Knowledge unit. The space also also involved the author.
What’s it like to host a Skype-A-Thon? – Ben Lennon reflects on the experience of being a part of a Skype-A-Thon. He shares the logistics involved, as well as the learning gained.
Google Earth Walks – Students engage in real-world problem solving as they work their way through a virtual tour on Google Earth (and within My Maps). Each placemark offers an engaging, geotagged image as well as a compelling question, challenging students to apply what they’ve learned in the real world.
G Suite offers the potential to use hyperlinks to make connections between parts. Although this can be an individual task, it is also something that has the potential to be done collaboratively as a whole class. Eric Curts has created a guide for making a Choose Your Own Adventure with Slides. However, he has also documented how to develop one using other applications. Going a step further with hyperlinks uses Hyper Docs to guide learning.
Writing Stories
Google has a number of ways to support students with writing, as well as providing different forms of engagement. The Docs Story Builder application provides the means of writing a story and having it played back on the screen. Kasey Bell has shown how to use magnetic poetry to provides students with a creative way to play with words. Another useful feature within G Suite is the Personal Dictionary. Accessed across all the different apps, it is designed to store words that the spellcheck usually sees as incorrect. However, it is possible to use it to develop a personal list of commonly misspelt words.
Working with Sheets
For many Sheets may not seem to be the right application for young learners. However, there is the potential to use formulas and conditional formulas to simplify their use. Alice Keeler has created a range of resources to support graphing and measurement using Sheets.
Self-Assessment
John Hattie speaks of the power and potential of ‘self-reported grades’. This can be a challenge for younger learners, especially when they may not have the language skills to place their learning. One answer is to provide students with a basic rubric made with Google Drawings and use this to place a character on a continuum. This provides a useful reference point for students to talk about their learning.
Using Templates
At the heart of many of these ideas is the use of templates to scaffold learning for students. By providing the beginnings, it allows students to get on with the act of making and creating. Alice Keeler has collected together some templates to use with students in Early Years, while Eric Curts has made a collection of graphic organisers. For more templates, check out this folder.
Google Classroom
A useful application for allocating tasks and copies of files for assignments is Google Classroom. Alice Keeler and Christine Pinto have unpacked some of the possibilities associated with Google Classroom in the Early Years. Another feature is the Google Classroom Chrome Extension and the ability to send a site to the whole class. An alternative to Classroom is Hapara. Whether it be Highlights or Smart Share, Hapara offers a number of ways to support learning and instruction.
Sharing Work
Another application for allocating tasks and copies of files for assignments is Google Classroom. Alice Keeler and Christine Pinto have unpacked some of the possibilities associated with Google Classroom in the Early Years. Another feature is the Google Classroom Chrome Extension and the ability to send a site to the whole class. An alternative to Classroom is Hapara. Whether it be Highlights or Smart Share, Hapara offers a number of ways to support learning and instruction. The other option to using either application is to share a folder with students in which they keep all of their work. However this can be problematic as it requires students to maintain this.
Teacher Toolbox
Not every classroom has access to the same technology. Some teachers only have access to a few desktop computers or an iPad. There are still a range of tools that can be used to support learning. One application that can be useful is Google Keep. It provides a number of options including photos, sketches and audio recordings (on mobile).Hollie Sisk has provided an overview of the features and affordances and how they integrate with G Suite. There are alsoother options, such as Seesaw, Book Creator and Adobe Spark Video. Each providing different ways of celebrating learning and identifying future areas for growth.
Challenges
Integrating technology into the early years comes with its challenges. These include:
Logging on & Passwords
One of the first challenges is getting students to log on. How students go about this will depend in part on what type of devices they are using. If they are using iPads then it is usually recommended that they are 1:1, therefore somewhat alleviating the need to continually log on and off all of the time. However, Apple recently added the functionality to have multiple Apple IDs for school purchased iPads. They only requirement is that the device is registered through Apple School Manager and deployed via a mobile device management system.
In regards to other devices, the process is usually dependent on how things have been set up. For example, it is common for Preps to be given a standard password when logging on to the system, preferably something that will not create confusion between lower and upper case. A site that can help with this process is DinoPass. In recent times, Google have started offering more options to connect with the Chromebook, such as Clever Badges and Cool Images.
Workflow
Associated with passwords is the issue of workflow. Once logged in, there is the challenge of backing up work. Unless the school has 1:1 devices, this is going to involve compromise. For example, some schools create class accounts and have students share work to a central repository. Although this simplifies the process, it also restricts access to various applications and features. Another alternative is to setup something like WebDav. Although this is useful when working with iPads, it involves setting up and does not necessarily provide students with the power to collaborate. Too often this decision is either assumed or ignored. It is important to consider your own context and start there.
Inappropriate Searches
Another challenge when it comes to younger students is searching for content online. There are are numerous ways of placing restrictions on searches. Firstly, the process could be automated. This may involve turning the safesearch feature on automatically in GSuite Admin or using an extension like CraftyRights to send students straight to images appropriate for reuse. This approach is to provide students with sites that allow them to search through curated content. Some options include Junior Safe Search, Watchkin and Photos for Class. For iPad, there are a number of browsers that can be downloaded which help refine searches. John Johnston has worked out a way to send image searches straight to reuse.
Turn Off the Lights: Works on all known video sites, the entire page other than the video fades to black with a single click allowing students to focus on the video only.
Just Read: With one click, you can remove distractions such as advertisements and pop ups allowing articles to be read in a customisable, simplified format.
Accessibility
Read&Write: Read&Write for Google Chrome™ offers a range of powerful support tools (such as having words, passages or even whole documents read aloud or the meaning of words explained) to help students gain confidence with reading, writing, studying and research.
High Contrast: Change or invert the color scheme to make webpages easier to read.
Added Functionality
CraftyRights: Forces all Google Image searches to be for images free of copyright restrictions.
Grammarly: Adding Grammarly to Chrome means that spelling and grammar will be vetted on Gmail, Facebook, Twitter, Linkedin, Tumblr, and nearly everywhere else writing on the web occurs.
New Functions
1-Click-Timer: A quick and easy timer for Google Chrome.
Goo.gl: Allows current website URLs to be shortened with the Google URL Shortener service. Makes it easier to share long website addresses with others.
Screencastify: A simple video screen capture software which links with Google Drive.
Saving Content
Save to Drive: Save web content or screen capture directly to Google Drive.
Padlet Mini: Collect and bookmark the best of web content including images, video and audio using Padlet.
Resources
A Guide to Chrome – A post that goes deeper into many aspects of Chrome.
It is often argued that learning needs to be redefined, transformed into something different. Going beyond what that change may be, a powerful tool that can help drive this are blogs. Originally designed as a means for logging information on the web, blogs have come to take many forms and purposes. This session is about harnessing the power and potential of blogging to develop learning inside and outside of the classroom. Whether you are confused about where to start or what possibilities blogs can offer, this session is for you. Aaron will provide a range of practical tips and tricks associated with the differences between platforms, how to build a blog from scratch, as well as a range of examples and ideas of how blogs can be used in schools. The reality is, developing creative learners often depends on providing a place for them to shine and blogs is the perfect platform for this.
Creating, Making and Visualising: Integrating Technology within a Classroom that Works
Session Description
Many schools are going through the process of implementing and adapting instructional models only to be left wondering the place and purpose of technology. Rather than somehow seeing these two things as being separate, technology is best seen as an accelerator, making deep learning more doable. Whether it be visualising thinking, creating non-linguistic representations, taking notes, developing summaries, engaging in debate, providing feedback or working collaboratively, this session is for you. Aaron will unpack the positives and negatives associated with a range of digital platforms and programs, including Google Apps, Canva, Verso, Padlet, Edublogs, Paper53 and Adobe Creative Cloud. In addition to this, he will discuss some of the things to consider when introducing various applications and managing change across a whole school. Too many create a divide between digital technologies and deep thinking. Believing that somehow they need to sacrifice technology for the learning to go deeper. The purpose of this session is to provide an overview of the platforms and programs which made deeper thinking more possible and more doable. In addition to this, it will discuss some of the limitations and things to consider when implementing such change across a whole school.
In this presentation, participants will be provided with the why, how and what associated with blogging. Whether it be the difference between platforms and what they allow. Ideas for what blogs can be used for. As well as the challenges associated with blogging, including restricting content and transferring content.
Collaboration, Communication and Creativity – Exploring the Tools for Change
Blurb for the session:
How many fantastic ideas or initiatives have failed not because of the strength of the idea, but because it failed to be heard. Change need not be restricted to the lone nut. This session is about using the power of technology to transform ideas into movements. Whether you are trying to develop a team in a school or connect a network of people, Aaron will provide a great array of practical examples for how to build change from the ground on up and why technology is the leverage that every idea needs to go from being good to great.
Ignite the Learning in Your Classroom by Leading the Way
Blurb for the session:
This session will provide you with another point of view on how to flip learning. Often we talk about changing our classrooms, putting students at the centre, connecting with authentic audiences and flipping instruction. However, the first thing that needs to be flipped is the role of the educator. Instead of focusing on being a teacher, we need to go back to the beginning and become learners once again. From using social bookmarking to connect with a community, to keeping a blog to share thoughts and reflections, this will be a hands on session focusing on taking the next step in and outside of the classroom. Throughout, Aaron will provide examples of how today more than ever technology allows us to be the drivers of our own learning.
My presentations from DigiCon15 Conference organised by DLTV held at Swinburne University, 24th and 25th July 2015
Digital Creating and Making (Fringe Festival)
Session Description
So often we come to conferences and see new applications flashed around, showing their possibilities and potential, only to discover that in practise they require more time and energy than was previously realised. What is often missing ingredient in all of this is constraint. This can be the time allocated or our particular knowledge and skillset, but it also exists within programs whether it be functionality or the focus of the task at hand. Too often such constraints go unseen, but by identifying them, it provides us with more clarity and allows us to get on with things in a more focused manner.
Quick Makes is about giving the chance to tinker with a range of applications and programs, each with their own constraints, to discover that creating, making and engaging with technology is not only easy but can be fun, especially when we are focused. From mashing up a website with Mozilla Thimble to creating your own visual with Google Draw, spend a few minutes exploring the potential for technology to make giving a voice to learning more doable.
For some Google Apps for Education simply offers a more efficient way of doing what is already being done, while for others the idea of collaborating and moving to the cloud is a game changer. Although it is essential to develop a clear implementation plan, it is also important to find the small wins along the way which helps demonstrate the way that Google can revolutionise the way we collaborate and communicate in and out of the classroom. From conducting surveys, to creating digital workbooks, to managing learning goals, to sharing presentations, to developing digital community, this presentation will be jam packed with practical samples and examples. Aaron hopes to spur on new ideas and start the conversation about what you can do in your school to make change.
So You Want To Be a Google Educator
Have you ever wanted to become a Google Educator, but didn’t really know what was involved or where to start? This session is for you. Having recently gone through the process myself, I will unpack what it is all about, what is involved, the challenges you will face and how it all fits in the wider scheme of things. Throughout, I will provide you with some tips and tricks to support you along the way.
Checked intoDLTV14 Conference
Listening to the Voices In and Out of the Classroom
Here is the blurb for the session that Steve Brophy and I presented:
One of the biggest challenges in education today is how to empower everyone and give a voice to every learner, this means moving beyond listening to those who seek to be heard and finding ways to capture every voice in and out of the classroom. From collaborating on a document to using a learning response system to reflect on a unit of work, this session will look at not only how we can use various web 2.0 tools to capture the different voices in and out of the classroom, but also how these tools can be used to provoke and prompt further into ongoing dialogue. Presenting our thoughts and reflections from a wide range of settings and scenarios, both Primary and Secondary, we hope that you leave this session armed with an array of tools and ideas that will help you go and listen to some of those lost and hidden voices today.